Don’t Be Fooled: How to Analyze Before and After Photos Like a Pro
Results are everything in plastic surgery. Patients scrutinize before-and-after photos to make life-changing decisions. But what if many of those images are intentionally deceptive? Photographic standards have significantly declined, and it’s now common for plastic surgeons, dermatologists, injectors, and device companies to manipulate photos with subtle tricks to exaggerate results.
In this blog, I’ll teach you how to cut through the smoke and mirrors, critically evaluate before-and-after photos, and avoid being misled.
#1 - Lighting Can Change Everything
Lighting is one of the biggest factors that can drastically alter the appearance of skin texture, tone, and even contours. A single light source can create shadows that make features look more defined. All credible medical photography should have two light sources to show the entire face evenly.
Pro Tip: Look at the reflections in the patient’s pupils. If you only see one reflection, it indicates a single light source, which will create deceptive shadows. You should see reflections from two softboxes, which provide more even lighting.


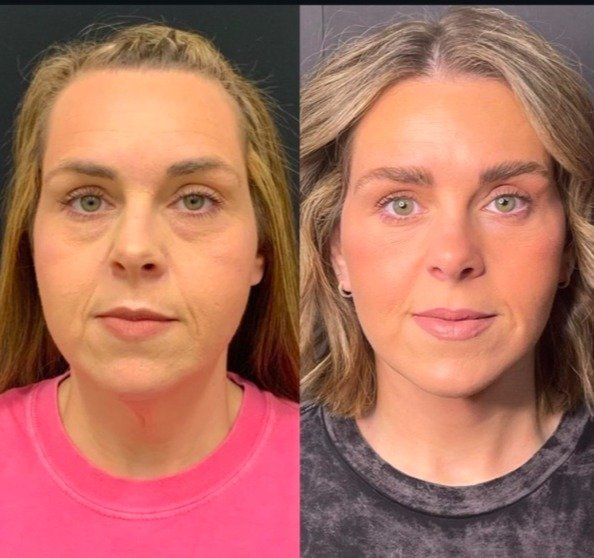
This example above is a classic example of how lighting manipulation can mislead viewers in before-and-after photos. The “before” photo uses minimal lighting, casting shadows that exaggerate facial hollows and imperfections. In contrast, the “after” photo is taken with brighter, more direct lighting, likely from a ring light, which overexposes the skin and creates a smoother appearance. The lack of two softboxes positioned at 45-degree angles further skews the comparison, making it impossible to fairly assess the actual surgical results. Proper, consistent lighting is crucial for an honest representation of outcomes.
#2 - Beware of Lens Distortion
Have you ever noticed how your face looks different in selfies? That’s because smartphone cameras use wide-angle lenses, which create a “fish-eye effect.” This effect distorts facial proportions, making features like the nose appear larger and the face look more rounded. It’s a common trick in “before” photos to exaggerate imperfections. In contrast, “after” photos might be taken with a more flattering lens or camera setup, making the results appear dramatically improved.
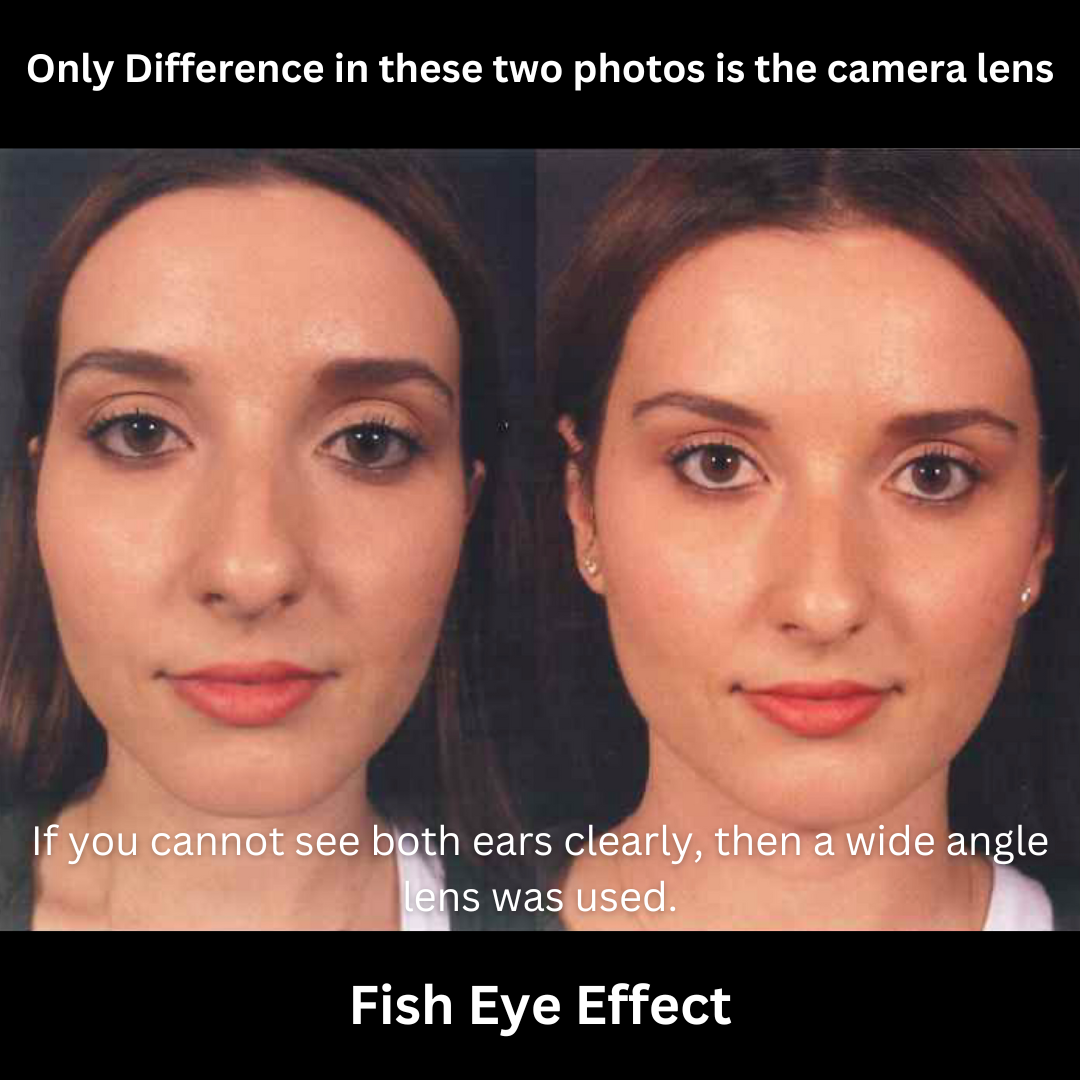
Pro Tip: If you can’t see both of the patient’s ears clearly in a frontal photo, it’s likely a wide-angle lens was used. This can make the face appear broader and the nose more pronounced, creating a distorted view of reality.
Take a look at the example below: No surgery or cosmetic procedure was performed—the only difference between these two photos is the camera lens. The wide-angle lens on the left causes facial distortion, while the standard lens on the right provides a more true-to-life representation. This shows just how much lens choice can influence before-and-after photos.
At our practice, we use a 100mm macro lens, which provides the most accurate and true-to-life representation. Unlike wide-angle lenses, the 100mm macro lens captures facial features without distortion, maintaining proper proportions. This ensures that what you see in our photos is as close as possible to what you’ll see in real life.
#3 - Angles and Posture Tricks
Subtle changes in posture, head angle, and camera angles can make a huge difference in the apparent outcome of a procedure.
A slight tilt of the head or forward posture can make the neck appear tighter or the jawline more defined.
An elevated camera angle can make the neck and double chin appear more flattering by reducing shadows and elongating the neck. This angle often minimizes the appearance of fullness under the chin, creating a slimmer, more contoured look in photos.
Pro Tip: Look for consistency in head positioning, camera angles, and facial expressions between the before and after shots. Any significant variations can be intentional manipulations to exaggerate the results.
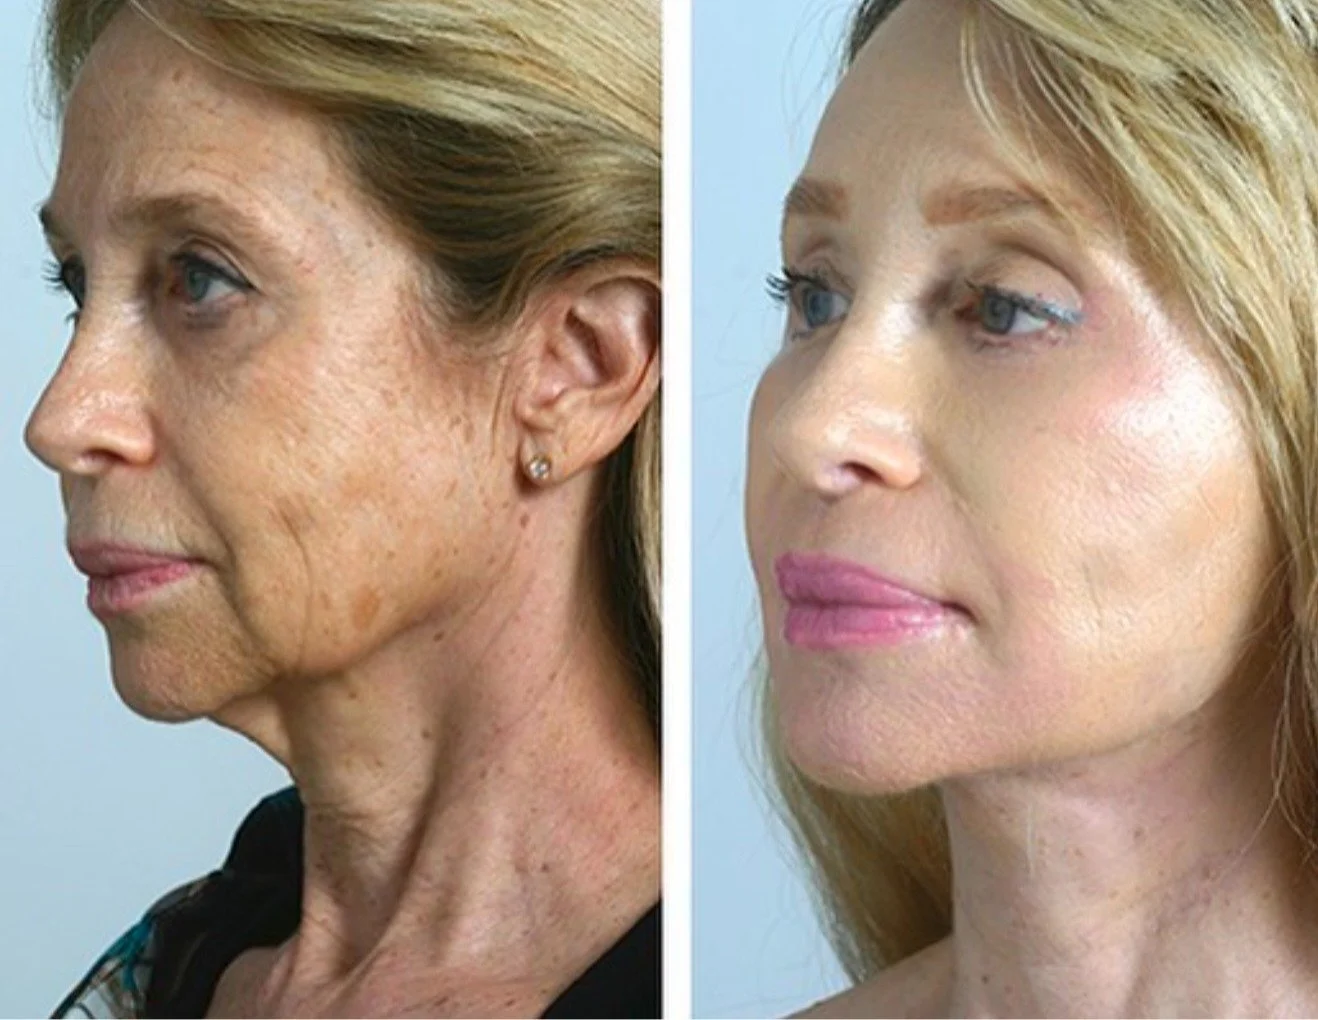
In this photo above, we see how posture and angles can dramatically influence the perception of facelift results. In the “before” image, the patient’s head is slightly tilted downward, emphasizing the appearance of jowls and skin laxity. In contrast, the “after” photo shows the patient with her chin lifted and neck extended, creating a more refined jawline and smoother neck appearance. This change in angle can falsely enhance the results, making the surgical outcome seem more significant than it might actually be.
#4 - Makeup, Filters, & Facial Expressions
Makeup can do wonders for enhancing skin tone, concealing imperfections, and highlighting certain features. Some “after” photos might feature patients with a full face of makeup or improved skin due to skincare treatments, making the surgical results look more dramatic.
Facial expressions can also alter the appearance. A frown or neutral expression in the “before” photo followed by a slight smile in the “after” can make a facelift or filler result seem more impressive.
Pro Tip: Pay attention to the overall skin texture and any visible makeup. A fair comparison will show patients with similar makeup or no makeup in both the before and after images. Also, if you cannot see pores on the skin, then it’s likely that a filter is being used or a low quality image was taken.

In the example above, the patient has a neutral expression in the “before” photo and is smiling in the “after,” which can exaggerate results. She’s also wearing makeup in the “after” and none in the “before,” further altering the perception of her skin. Additionally, the lighting and setting differ, with the “after” photo taken in a non-medical setting with softer, more flattering lighting. Such inconsistencies are simply misleading.
#5 - Selfies
Selfies may seem like an easy and relatable way to show results, but they introduce numerous variables that make them unreliable for documenting surgical outcomes. When patients take their own photos, they often unknowingly use flattering angles, various filters, or inconsistent lighting conditions. Additionally, the distortion caused by most smartphone cameras, especially in close-up selfies, can alter the proportions of the face, exaggerating or minimizing specific features. This distortion makes it impossible to evaluate the true effects of a procedure.
Pro Tip: To fairly judge surgical results, always look for professional, standardized images taken in controlled environments. These photos should use the same lighting setup, camera angles, and equipment for both the “before” and “after” shots to ensure an accurate representation of the changes.
Selfies may be useful for patients to share with friends or track their own progress, but for clinical purposes, they should never be used as the primary tool for showcasing outcomes. Relying on selfies to demonstrate results can be misleading and gives an incomplete picture of the procedure’s true effectiveness.
Conclusion: Truth and Transparency Matter
When considering a cosmetic procedure, you deserve to see authentic results, not marketing tactics. As a plastic surgeon, I am committed to maintaining high standards in medical photography and providing my patients with an honest portrayal of what they can expect. By recognizing the tricks used in many before-and-after photos, you’ll be better equipped to find a provider who values transparency over hype.
Acknowledgments
I would like to express my gratitude to my mentor, Dr. Stephen Perkins, and our visual media specialist, Nancy Rothrock, for instilling in me the highest standards of medical photography. Dr. Perkins has long been a leader in the field of plastic surgery, setting the bar for excellence in accurately documenting surgical outcomes. Their guidance has been invaluable in shaping my commitment to transparency and precision in patient care.
It’s important to note that the examples in this blog post are not intended to undermine the skills of other surgeons but to raise awareness about misleading photos on social media. My goal is to highlight the importance of transparency and accuracy in showcasing surgical results. I understand that challenges such as having patients return for follow-up, particularly those who live far away, can sometimes limit the photos available to share. I’ve faced this issue myself and recognize the limitations it presents (I even have one "selfie" image on my own page).
Disclaimer
The images featured in this blog post are used for educational purposes to help readers critically evaluate before-and-after photos in the context of cosmetic surgery. Each image is accompanied by significant commentary and analysis to highlight common photographic techniques that can exaggerate or misrepresent surgical outcomes. The use of these images is intended solely to inform and educate the public about transparency in medical photography, and falls under the principles of “fair use” as outlined by U.S. copyright law. No ownership or endorsement of the images is claimed, and full credit remains with the original photographers and creators.
If you are the copyright owner of any images used in this post and would prefer that they be removed, please contact us in writing through the contact page of this website, and we will promptly address your request.